
Every month, I give out Namecheap and HostGator discount coupons. But I always suggest buying your domain from Namecheap or GoDaddy instead of HostGator. Why? Because it’s cheaper, and if something goes wrong with your hosting account, you won’t lose your domain.
Must read: How To Buy Domain Name From Namecheap

When you purchase a hosting plan from HostGator, they will provide you with unique nameservers for your hosting account. You need to log in to your domain manager service & update the nameservers to point to HostGator.
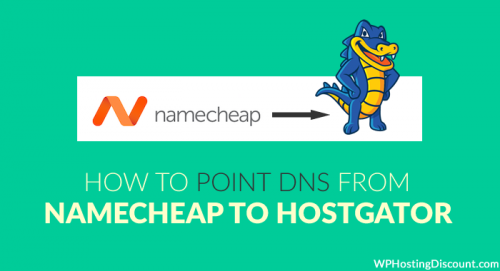
In this tutorial, we will be updating the nameservers of a domain purchased from Namecheap to point to our HostGator hosting account.
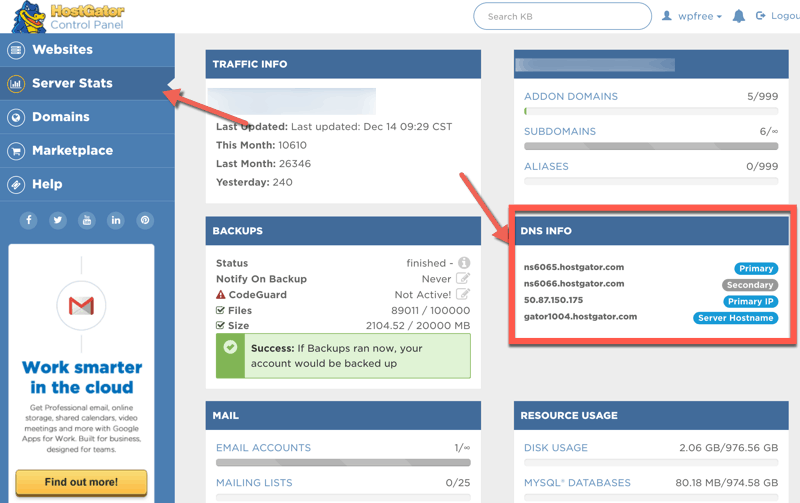
To get started, grab the nameservers from HostGator.
Log in to your HostGator cPanel, and on the right-hand side at the bottom, you will find the nameservers.
First: Find your HostGator hosting nameservers

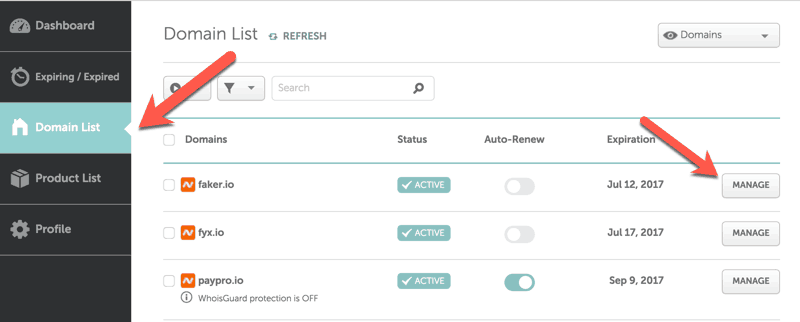
Now, log in to your Namecheap account, and click on “Domain List”. This will list all of your domain names.
Locate the domain you wish to change nameservers for, and click on “Manage”.


On the next page, scroll down & look for the option “Nameservers”.
From the drop down, select “Custom DNS” & enter your HostGator name server details.

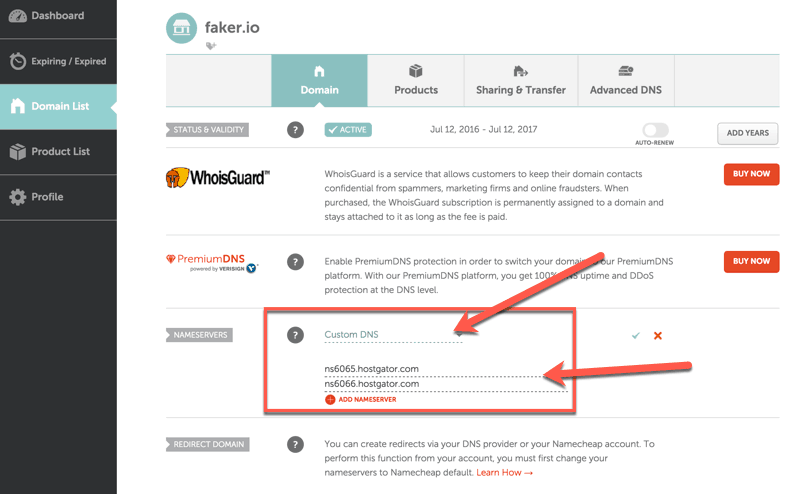

Do notice the small check mark (green color) on the same nameserver row. Click on that to save your new settings.
Your domain (hosted on Namecheap) will now be pointing to your HostGator hosting account.
However, you need to keep in mind that it may take up to 4 hours for this change to reflect globally. Usually, in my case, it takes 10-15 minutes maximum, but in certain scenarios, it can take more time than that. This is called DNS propagation delay.
This process works for most of our readers, but if you have an issue, feel free to let me know in the comments section below.
- Buy Domain From Namecheap
- Buy Web Hosting From HostGator (30% discount coupon: HGUSERS)
Find this guide useful? Share it with your friends!