If you are using Hostgator Baby plan or business plan, they will let you host multiple websites under the same hosting. To use a multi-website hosting feature of Hostgator, you need to add other domains as an add-on domain. In this tutorial, I will show you how you can add an addon domain to your existing Hostgator account.
Hostgator is one of the top notch WordPress Webhosting, and we highly recommend this Webhosting, if you are looking for a new host. If you want to know more about Hostgator, check our Hostgator review. If you are new to Hostgator and WordPress, read our previous tutorial on:
Using HostGator Addon domains feature:
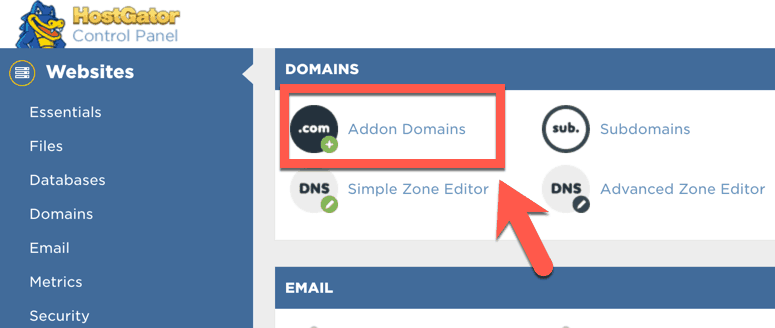
To add another domain into your HostGator hosting, all you need to do is login to your HostGator Dashboard. And under domains, click on addon domain.

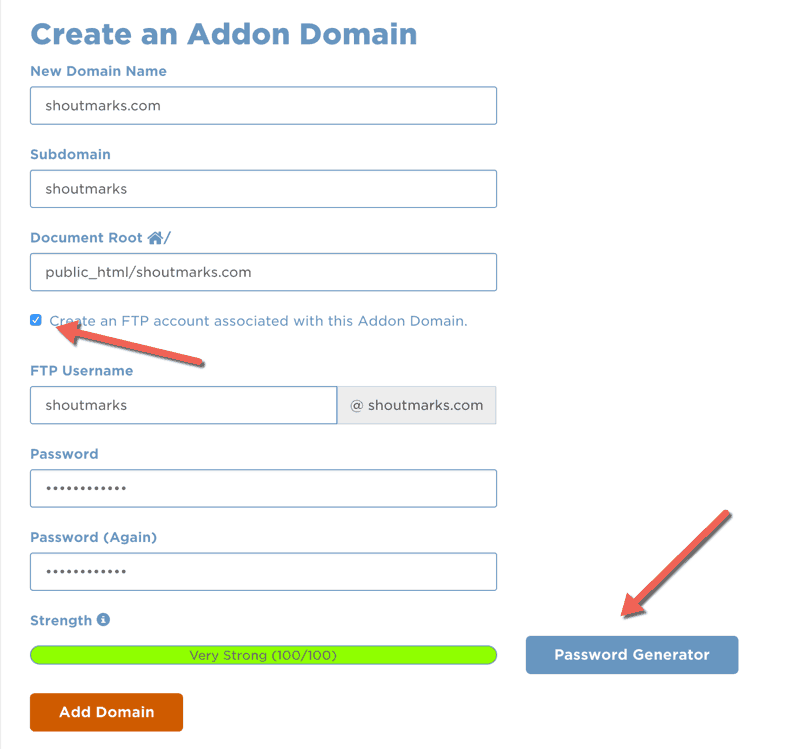
Add detail of Addon Domain:
Add detail of addon domain and give a directory to it. This is simple. Check screenshot:

Click on add domain and your domain is added to your Hostgator account. If you have purchased domain the from elsewhere (recommended), change your Domain Name server to point it to HostGator account.
Confirmation:
After clicking on add domain, you will be redirected to a confirmation page.
That’s it and after this, all you need to do is install WordPress on your newly created domain and your website will be live in 5 minutes.
Do let us know if you have any question regarding addon domain feature of HostGator hosting?
Subscribe
Contents


2 thoughts on “How to Add addon domain to HostGator Shared hosting”
Can we host multiple domains on hostgator’s hatching plan? What are the subscription rates for different plans?
Ravi
Hatchling plan let you host only 1 domain.
If you planning to host more than one domain, go for baby plan.
You can get complete feature and review about Hostgator different plans here:
https://wphostingdiscount.com/hostgator-webhosting-review/